
While my company has wonderful resources to allow employees to study for our certifications, they are time limited to prevent waste. I find I’ve often kicked off the lab, only to get distracted with a reql-world-interrupt, and come back to find the lab has timed out. I like working on my own systems, and having my own servers to work on. As such, I’m setting up a complementary system to the corporate one for my own study.
Table of contents
Overview
Here’s the general idea; I’m going to use libvirt and the virtualization infrastructure of my system to build a private network that I can use to provision virtual machines. This network will not have the standard DHCP server, but will, instead, have a specifically targeted on that works in conjunction with a tftp server to provision images. This setup is called Preboot Execution Environment (PXE, usually pronounced Pixie. This should help you remember it.

Pixie booting as we would all like to imagine it.
Network Setup
While I originally created the network using the virt-manager UI, I have it now in XML form. it looks like this:
<network> <name>provision</name> <uuid>bc9db3c9-89a8-41de-9cfa-bd9b5bd771f3</uuid> <bridge name='virbr1' stp='on' delay='0'/> <mac address='52:54:00:39:08:19'/> <domain name='provision'/> <ip address='192.168.131.1' netmask='255.255.255.0'> </ip> </network> |
Create a blank VM on the network setup to PXE boot, and ensure that it does not get a DHCP response.
There are a few guides to setting up PXE on Fedora. This one seems fairly recent, although a few things have changed and I’ll note them. Lets start with the DCHP setup. Aside from replacing yum with dnf, the name of the package is dhcp-server, not dhcp.
sudo dnf install -y dhcp-server |
We want this listening on the interface that the VMs are on. From the XML fragment above, we can see that is the virbr1 Bridge. Run ip addr on my laptop shows:
16: virbr1: <NO-CARRIER,BROADCAST,MULTICAST,UP> mtu 1500 qdisc noqueue state DOWN group default qlen 1000 link/ether 52:54:00:39:08:19 brd ff:ff:ff:ff:ff:ff inet 192.168.131.1/24 brd 192.168.131.255 scope global virbr1 valid_lft forever preferred_lft forever |
Since the IP address is 192.168.131.1/24, which maps to the virsh network XML document above, I am fairly certain that if I get a DHCP server listening on this interface (and only this one) I can use it to provision VMs without interference from other DHCP providers.
TCPDump
Lets check with tcp-dump. Thanks for this little fragment.
$ sudo tcpdump -i virbr1 -n port 67 and port 68 tcpdump: verbose output suppressed, use -v or -vv for full protocol decode listening on virbr1, link-type EN10MB (Ethernet), capture size 262144 bytes |
To start that shows nothing. Now fire up the virtual machine and:
20:02:03.781250 IP 0.0.0.0.bootpc > 255.255.255.255.bootps: BOOTP/DHCP, Request from 52:54:00:4f:e4:fa, length 396 20:02:05.758560 IP 0.0.0.0.bootpc > 255.255.255.255.bootps: BOOTP/DHCP, Request from 52:54:00:4f:e4:fa, length 396 20:02:09.713201 IP 0.0.0.0.bootpc > 255.255.255.255.bootps: BOOTP/DHCP, Request from 52:54:00:4f:e4:fa, length 396 |
So that is what our DHCPD instance needs to field.
DHCPD Configuration
The configuration file is now in /etc/dhcp/dhcpd.conf
$ rpmquery -f /etc/dhcp/dhcpd.conf dhcp-server-4.3.6-8.fc27.x86_64 |
And it is pretty much empty.
$ sudo cat /etc/dhcp/dhcpd.conf # # DHCP Server Configuration file. # see /usr/share/doc/dhcp-server/dhcpd.conf.example # see dhcpd.conf(5) man page # |
Here is a minimal configuration.
subnet 192.168.131.0 netmask 255.255.255.0 { allow booting; allow bootp; option domain-name "ayoung541.test"; option domain-name-servers 127.0.0.1; option routers 192.168.131.1; next-server 192.168.131.1; filename "pxelinux.0"; range 192.168.131.10 192.168.131.20; } |
I poked around a bit, seeing if I needed to do something to make dhcpd only listen on the specified interface, and found this in /etc/sysconfig/dhcp
# WARNING: This file is NOT used anymore. # If you are here to restrict what interfaces should dhcpd listen on, # be aware that dhcpd listens *only* on interfaces for which it finds subnet # declaration in dhcpd.conf. It means that explicitly enumerating interfaces # also on command line should not be required in most cases. |
So I figure with the above configuration I should be Ok. Restart the DHCPD daemon via syscontrol, run tcpdump with the same options, and restart the virtual machine.
First off, I see the following in tcpdump’s output:
21:39:11.791024 IP 0.0.0.0.bootpc > 255.255.255.255.bootps: BOOTP/DHCP, Request from 52:54:00:4f:e4:fa, length 396 21:39:12.792374 IP 192.168.131.1.bootps > 192.168.131.10.bootpc: BOOTP/DHCP, Reply, length 300 21:39:12.792506 IP 0.0.0.0.bootpc > 255.255.255.255.bootps: BOOTP/DHCP, Request from 52:54:00:4f:e4:fa, length 408 21:39:12.792616 IP 192.168.131.1.bootps > 192.168.131.10.bootpc: BOOTP/DHCP, Reply, length 300 |
Which is pretty encouraging. Looking at the vms console, I see:
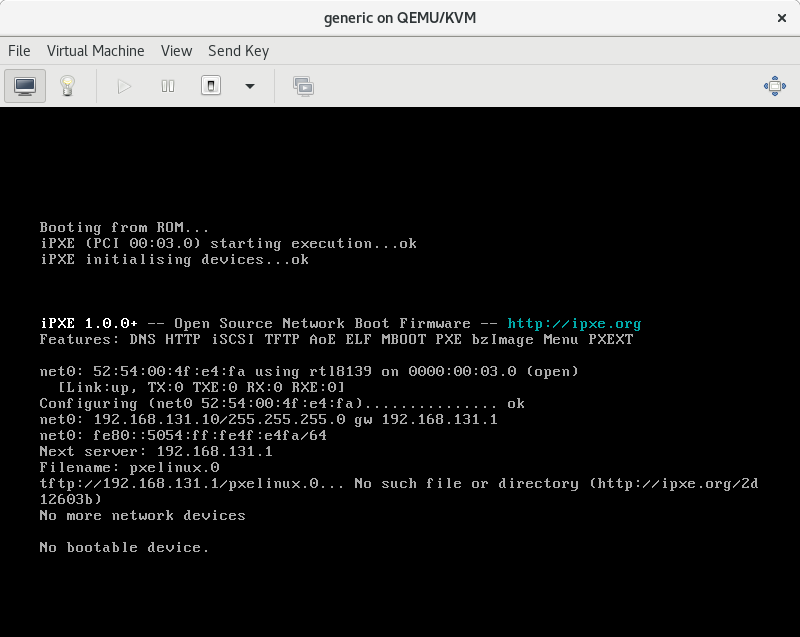
PXEBoot Output, No such file.
This is success! A couple things to note:
- The VM got the IP address of 192.168.131.10 which was the first one in our range.
- It attempted to download a file named pxelinux.0 via tftp. That matches what I set in the config file.
Leases
We can see the lease granted to this machine via the leases file.
$ sudo cat /var/lib/dhcpd/dhcpd.leases
# The format of this file is documented in the dhcpd.leases(5) manual page.
# This lease file was written by isc-dhcp-4.3.6

# authoring-byte-order entry is generated, DO NOT DELETE
authoring-byte-order little-endian;

lease 192.168.131.10 {
  starts 6 2018/02/10 00:57:12;
  ends 6 2018/02/10 12:57:12;
  tstp 6 2018/02/10 12:57:12;
  cltt 6 2018/02/10 00:57:12;
  binding state active;
  next binding state free;
  rewind binding state free;
  hardware ethernet 52:54:00:4f:e4:fa;
  uid "\001RT\000O\344\372";
  set vendor-class-identifier = "PXEClient:Arch:00000:UNDI:002001";
}
server-duid "\000\001\000\001\"\020\365\344RT\0009\010\031";
So if we know a MAC address, we can find the IP address for it by searching through this file. If we want to pre-allocate address for a Known mac, we can either do it in the main /etc/dhcp/dhcpd.conf file or in a file in /var/lib/dhcpd.
TFTP Server
Next, I need to set up a TFTP server on that interface and serve out a file. Lets do that.
sudo dnf install -y tftp-server sudo touch /var/lib/tftpboot/pxelinux.0 |
This is obviously a bogus file, but this is going step by step. Lets use the tftp client to see if we can fetch that.
$ tftp 192.168.131.1 -c get pxelinux.0 $ file pxelinux.0 pxelinux.0: empty |
Looks good. Delete the empty files and keep going.
SYSLINUX
sudo dnf install -y syslinux sudo cp /usr/share/syslinux/pxelinux.0 /var/lib/tftpboot/ |
Lets try to pxeboot the VM again.
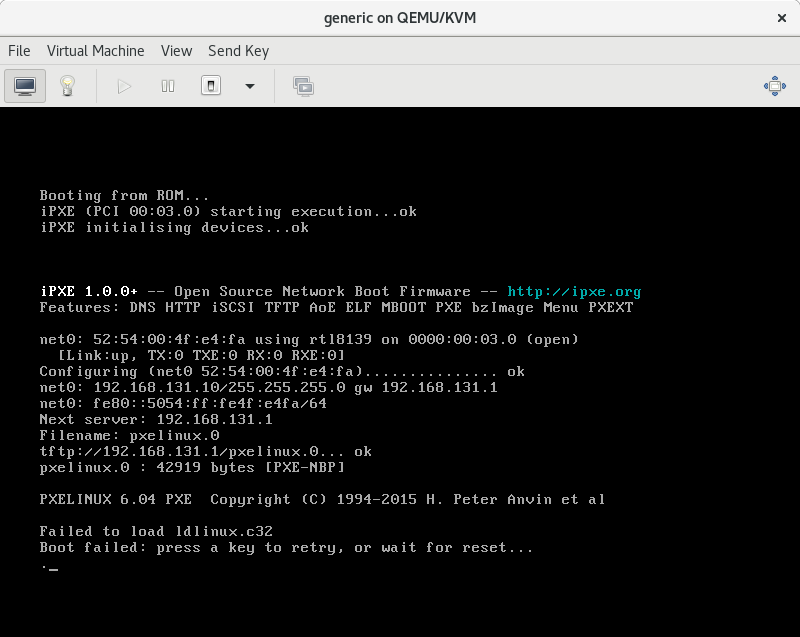
PXE Boot Fail looking for ldlinux.c32
Again, we move toward success. The TFTP server is working, and the PXE boot process on the VM attempts to download syslinux.
Lets get the rest of the files in place and try again:
sudo cp -a /usr/share/syslinux /var/lib/tftpboot/ |
Reboot the VM. A new failure:
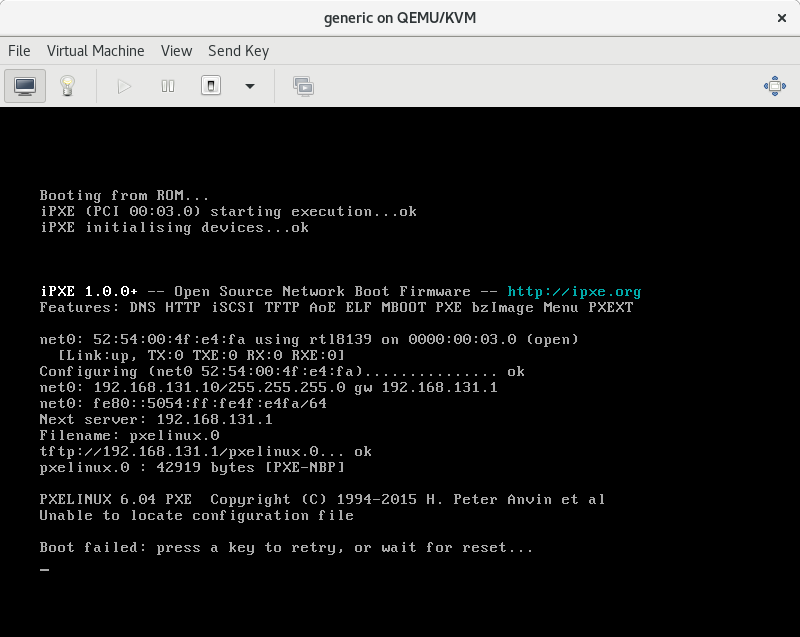
Kickstart
Lets make that configuration:
sudo mkdir /var/lib/tftpboot/pxelinux.cfg |
Create the file /var/lib/tftpboot/pxelinux.cfg/default and put in it:
path syslinux include menu.cfg default syslinux/vesamenu.c32 prompt 0 timeout 50 |
Create the file /var/lib/tftpboot/menu.cfg
menu hshift 13 menu width 49 menu margin 8 menu tabmsg menu title automated install boot menu label fedora-26-automated-install menu label ^Fedora 26 automated install kernel vmlinuz append vga=788 initrd=initrd.img ip=dhcp inst.repo=${MIRROR_URL} \ ks=nfs:${SERVER_IPADDR}:/var/lib/nfsroot/fedora-26-ks.cfg menu end |
This is obviously a straight lift from the above referenced Install. We are not going to leave it like this, just want to get it started for testing.
Lets kick off that PXE boot again:
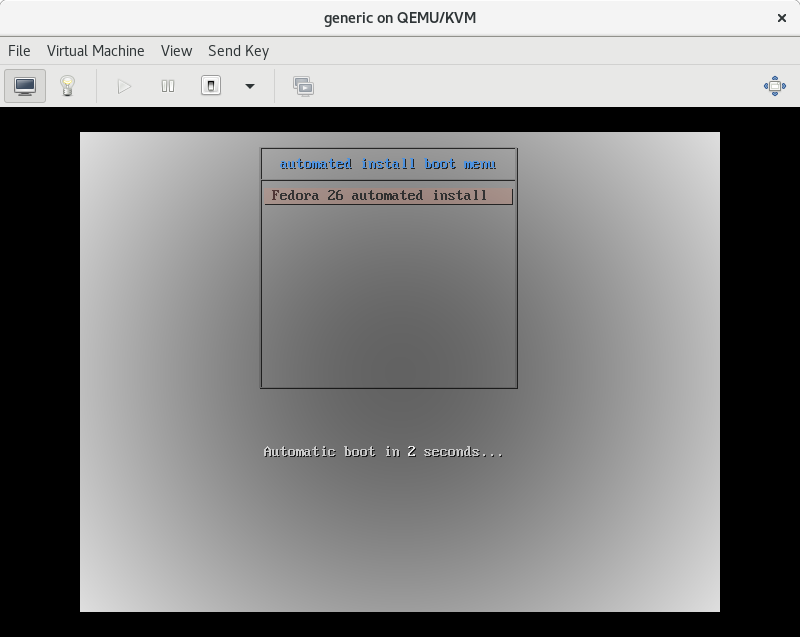
PXE Automated install Screen
This keeps looping around to 0 and restarting, as it lacks proper values for MIRROR_URL etc, and thus cannot download anything. So while we are still at a failure mode, we are ready to start looking at Kickstart files, which is one of the study objectives for the RH CSA exam. I’ll go through those more in depth in the future.