
The processes of development, installation, testing, and debugging of software all benefit from the use of a virtual machines. If you are working in a Linux based infrastructure, you have access to the virtual machine management on your system. There are a handful of related technologies that all work together to help you get your work done.
- A hypervisor is machine that runs virtual machines. There are several proprietary hypervisor distributions in the marketplace, such as VMwares ESXi and Microsofts HyperV.
- KVM is the Linux Kernel module that allows you to run a virtual machine in a process space isolated from the rest of the system.
- Qemu is an implementation of that virtual machine. It was originally an emulator (hence the name) and can still be run that way, but it is far more powerful and performant when run in conjuntion with KVM
- Xen is an alternative approach that preceeded KVM. It implementaed the entire virtualization in Kernel space; Linus did not like this approach and denied merging it into the mainline Linux Kernel.
- libvirt is a client/server implementation to allow you to communicate with a Linux machine running an implementation of virtualization like KVM/Qemu or Xen. There are a handful of other implementations as well, but for our purposes, we will focus on the KVM/Qemu approach.
- libvirtd is the server Daemon for libvirt. It is run via systemd on the current Fedora and Ubuntu releases.
- virsh is a CLI application that allows you to send commands to the libvirt subsystem
- virt-manager is a GUI program that lets you send libvirt commands via a more discoverable workflow.
There are other tools, but these are enough to get started.
In order to run a virtual machine, you need a hypervisor machine to host it. This might be your laptop, or it might be a remote server. For example, I am running Ubuntu 22 on a Dell Latitude laptop, and I can run a virtual machine on that directly. Here are the set of libvirt related packages I have installed:
- null
- gir1.2-libvirt-glib-1.0/jammy
- libvirt-clients/jammy-updates
- libvirt-daemon-config-network/jammy-updates
- libvirt-daemon-config-nwfilter/jammy-updates
- libvirt-daemon-driver-qemu/jammy-updates
- libvirt-daemon-system-systemd/jammy-updates
- libvirt-daemon-system/jammy-updates
- libvirt-daemon/jammy-updates
- libvirt-glib-1.0-0/jammy
- libvirt-glib-1.0-data/jammy
- libvirt0/jammy-updates
- python3-libvirt/jammy
I am fairly certain I only had to install libvirt-daemon-system and libvirt-daemon-driver-qemu and then enable the via systemd commands.
Once the daemon is up and listening, you can run the virt-manager gui to connect to it and perform basic operations. On Fedora and Ubuntu, this is provided by the package virt-manager and can be run from the command line as virt-manager.
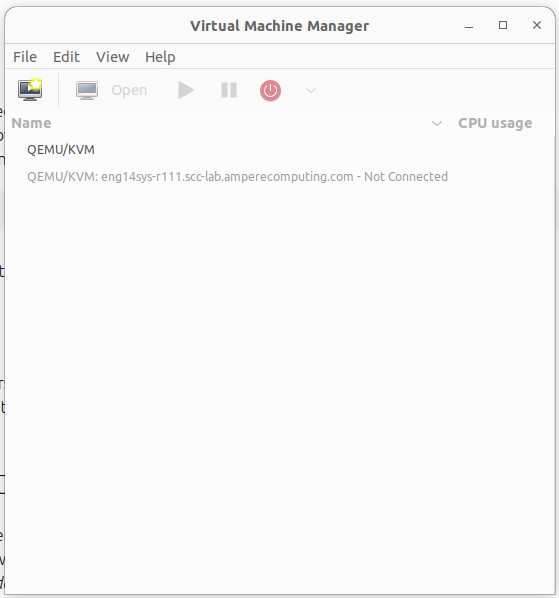
In the above picture, you can see the localhost listed in black, but also another host from our lab listed in gray. It is grayed out because I have not yet attempted to connect to this server this session.
The localhost system has no virtual machines currently defined. Adding one is simple, but you do need to have the install media to do anything with it. I’ll show this on the remote system instead. The steps you use to build a VM remotely are the same as you use to build it locally.
To Create a new connection, start by selecting the FIle menu and then Add Connection. Leave the Hypervisor as QEMU/KVM and select the checkbox to connect to the remote host over ssh. You probably need to connect to the remote machine as root. You can use either a FQDN or an IPv4 address to connect. IPv6 might work, but I have not tried it.
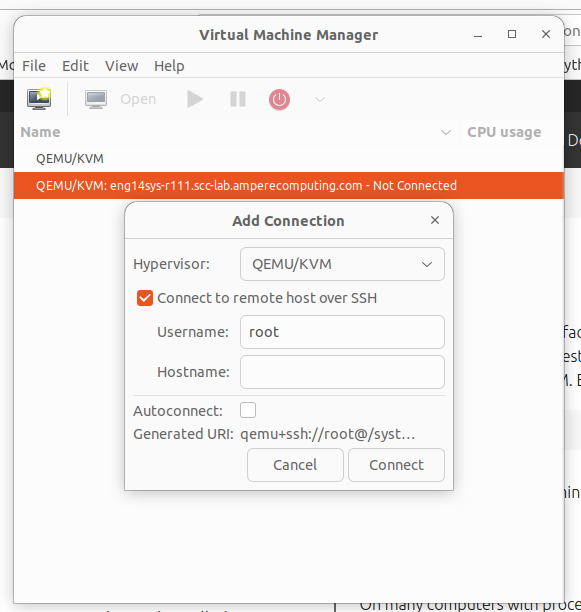
This is going to use the same key or password you would use to connect via ssh from the command line.
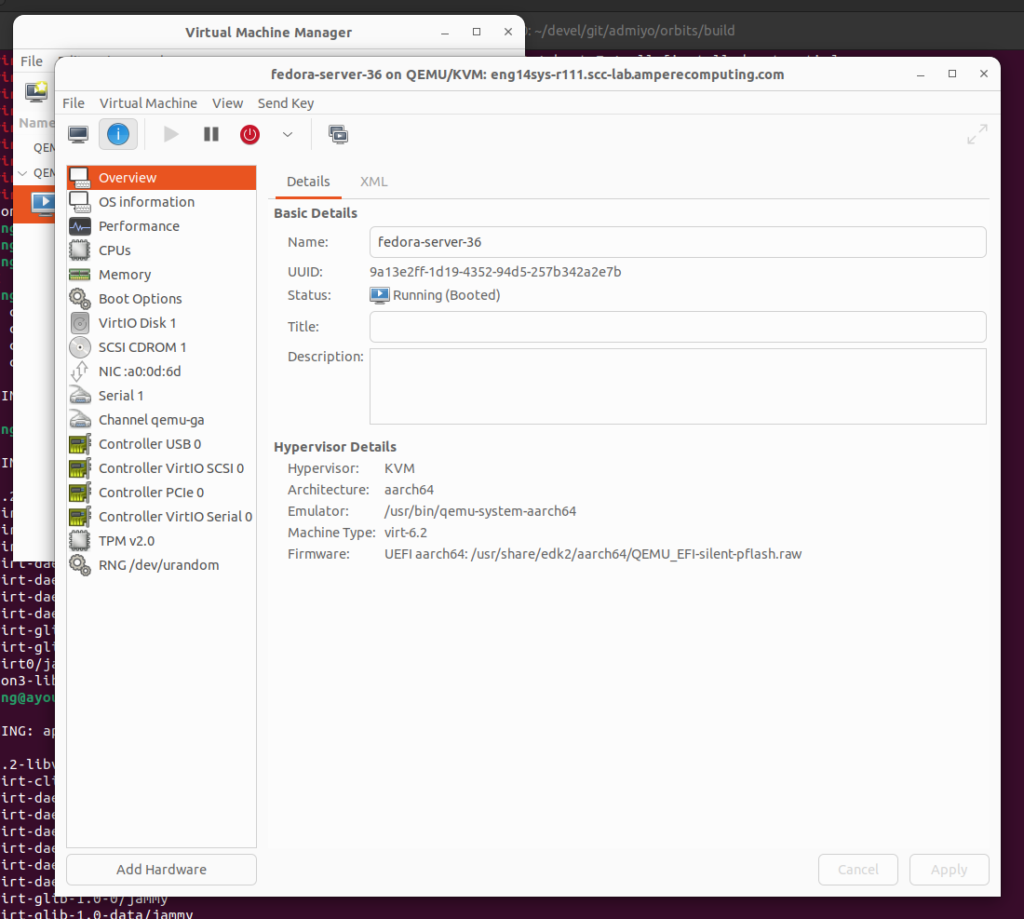
Once you have a connection, the line is displayed darker with any VMs listed. I have one VM, named fedora-server-36.
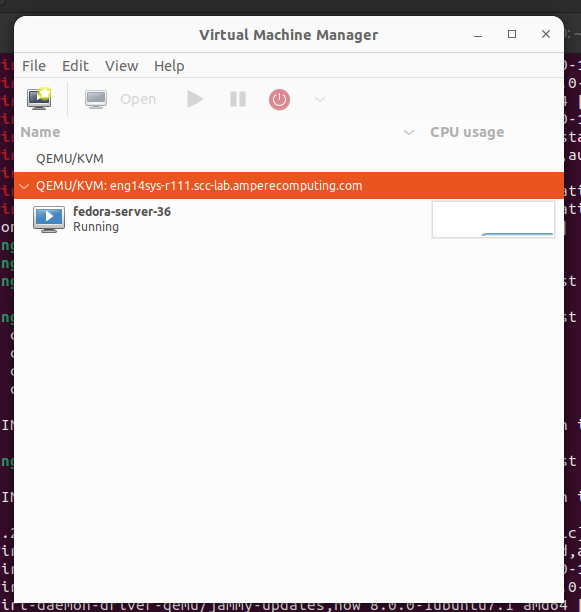
When running a virtual machine, you want to use the same architecture as the underlying hypervisor. For the most part, this means X86_64. However, I work for a company that builds AARCH64 based server chips, and the machine listed above is one of ours.
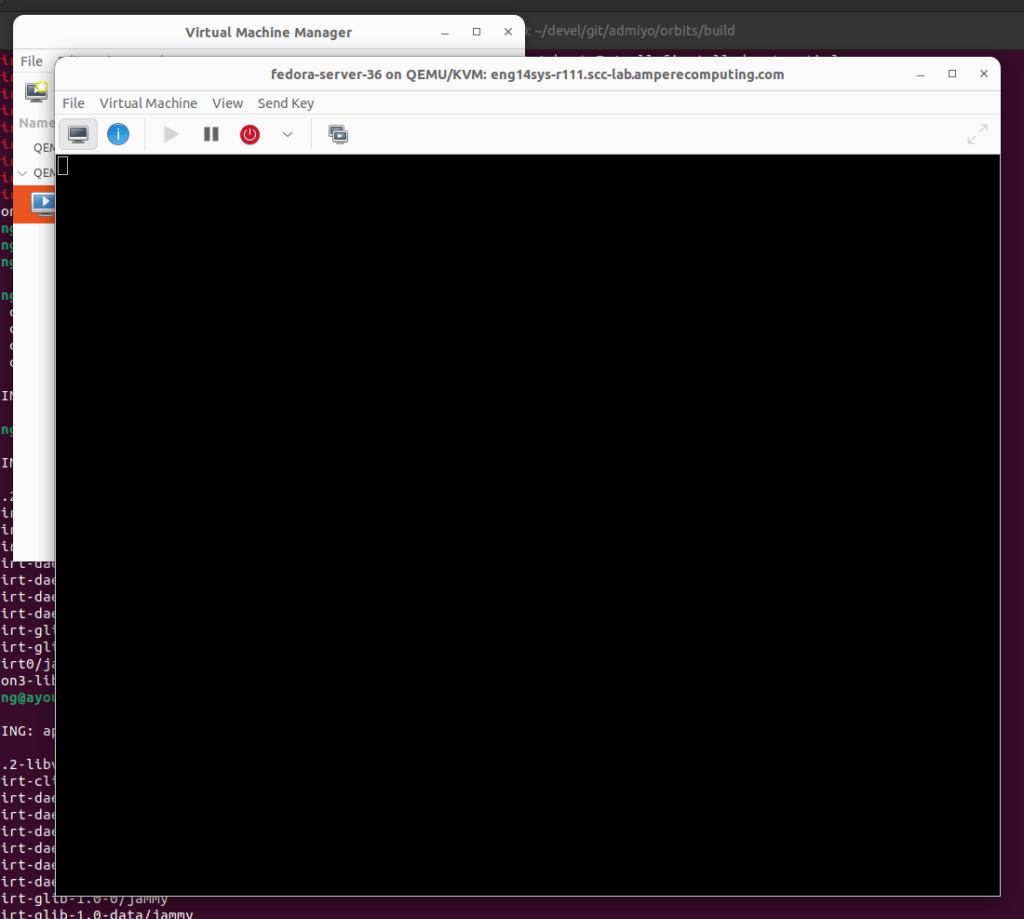
If you float the mouse over a running VM, right click and select the “open” you will get a terminal console.
To see the details you can select the View->details menu item. here you can see the Architecture is aarch64.
In the next article, will go through network configuration and launching a virtual machine.