
Minecraft is a land of Cubes. And yet, in this blockland, it turns out the circle is a very powerful tool. Using the basics of trigonometry, we can build all sorts of things.
Table of contents
Sine and Cosine
Table of contents
When a circle is drawn with it’s center at the origin of an axis, the coordinates for a point on the perimeter can be found using the Sine and Cosine Function.
A position on the ground in Minecraft is defined by the North – South position, Z and the East West position, X. If your avatar walks from the origin along the Green line, the Red and Yellow lines represent the X and Z values.

This actually shows how we draw a circle. If the Green line stays fixed at the center but pivots around it, the end of the green line draws the circle.
There area couple ways we measure the distance around a circle: degrees and radians. A circle can be divided up into 360 degrees, which is useful if you need to break the circle up into smaller pieces: 360 can be divided by many smaller integers to get 1/2, 1/3, 1/4, 1/5, 1/6, 1/8, 1/10 and multiples of those as well.  However, it gets less useful when we want to convert to Cartesian (X, Y, Z) coordinates.
Radians are based on the ratio of the radius to the perimeter of the circle. This ratios is the number Pi, in greek π, which is roughly 3.14159.  P = 2πr.
Yeah, 2Ï€. They couldn’t make it a simple value. Go read the tau manifesto.
Anyway, trig functions are defined in radians. Halfway around the circle is π radians. A complete iteration is 2π.
Oh, and because it all came from the ancient Greeks, we use another Greek letter for the angle: Theta. which looks like this θ.
Wow, I wish we used tau. But I digress.
If we are working in an X Y plane, there are two functions we can use that translate an angle in radians to the X and Y values of a point on the circle. The Y is calculated by the Sine, and the X value is calculated by the Cosine.

BlockPos
Minecraft uses the Class BlockPos to indicate a position in the world. Creating a BlockPos
new BlockPos( x, y, z )
To place an Obsidian block at the origin in Minecraft we can use the following function:
world.setBlockState( new BlockPos( 0, 0, 0 ), Blocks.OBSIDIAN.getDefaultState( ) );
If we want to draw a circle made of blocks in Minecraft, we can loop around the circle from θ = 0 to θ = 2π, and get the X and Y values (leave Z at 0).
  public static void circle_virt( World world, BlockPos origin, Block block, int i,
                                  double radius ) {
    for ( int degrees = 0; degrees < 360; degrees += 1 ) {
      double rads = next( degrees );
      double x = Math.round( origin.getX( ) + radius * Math.sin( rads ) );
      double y = Math.round( origin.getY( ) + radius * Math.cos( rads ) ) + i;
      double z = (double) origin.getZ( );

      world.setBlockState( new BlockPos(  x, y,  z ),
              block.getBlockState( ).getBaseState( ) );

    }
  }
Hooking it up to a command object, we can take a look at what it creates:
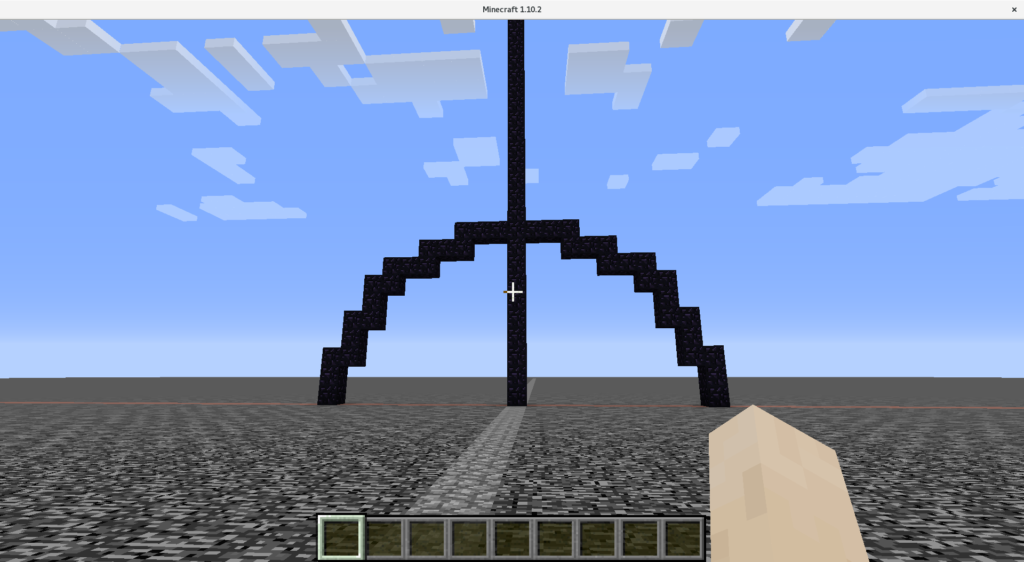
Vertical Circle at the Origin
Why is it only half a circle? Minecraft does not let us draw in the Negative Y space.
Offsets
Let’s add some code to allow us to move the center somewhere else, and to select a block to use to make the circle.
  public static void circle_virt_offset( World world, BlockPos origin, Block block, double radius ) {
    for ( int degrees = 0; degrees < 360; degrees += 1 ) {
      double rads = next( degrees );
      double x = Math.round( origin.getX( ) + radius * Math.sin( rads ) );
      double y = Math.round( origin.getY( ) + radius * Math.cos( rads ) );
      double z = origin.getZ( );
      world.setBlockState( new BlockPos( x, y, z ),
              block.getBlockState( ).getBaseState( ) );
    }
  }
Now let’s try to generate a circle up and to the right of our origin.
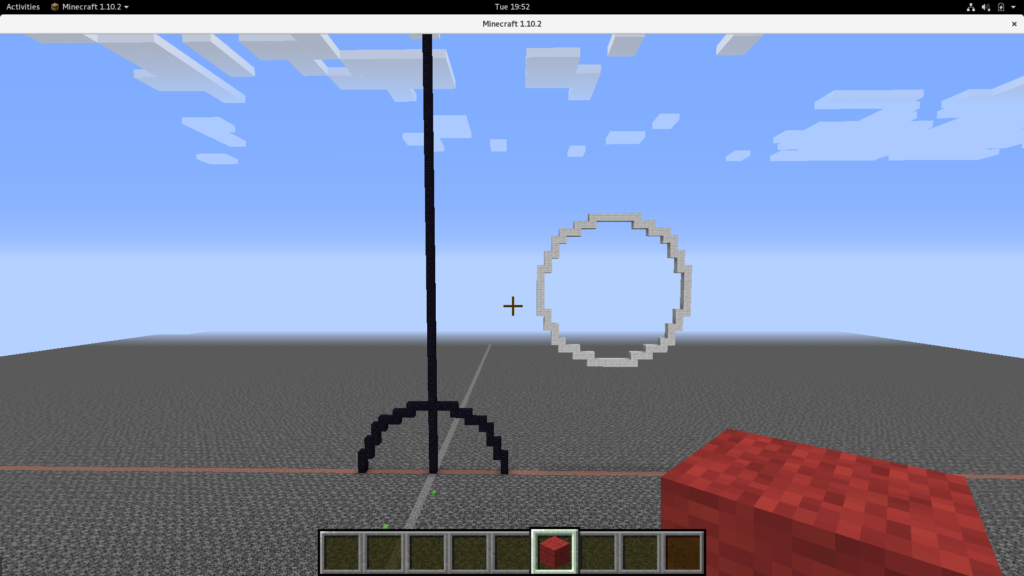
Vertical circle offset from the origin.
Yeah, Red Wool came out White…wrong state.
If we want to draw a circle in the X Z plan (parallel to the ground, we can use the same logic, but vary the X and Z parameters, and leave Y fixed, like this:
  public static void circle_horiz( World world, BlockPos origin, Block block, int i,
                                   int radius ) {
    for ( int degrees = 0; degrees < 360; degrees += 1 ) {
      double rads = next( degrees );
      double x = Math.round( origin.getX( ) + radius * Math.sin( rads ) );
      double y = origin.getY( ) + i;
      double z = Math.round( origin.getZ( ) + radius * Math.cos( rads ) );

      world.setBlockState( new BlockPos( x, y, z ),
              block.getBlockState( ).getBaseState( ) );
    }
  }
And we get .
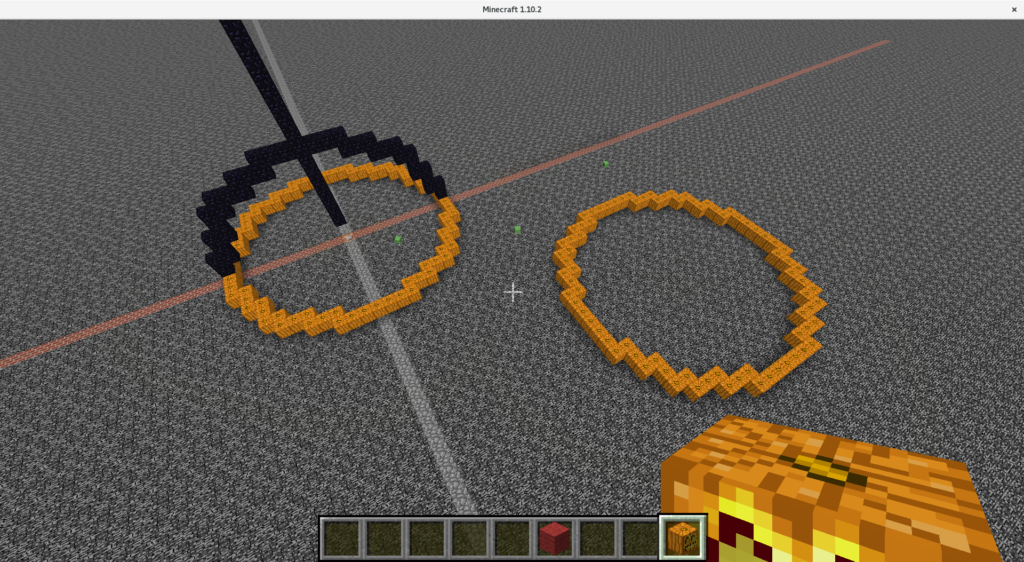
Horizontal Circles, one at the origin,. one offset.
Other Shapes
Once you get the basics down, you can add additional logic to generate disks…
public static void disk( Block block, int i, int radius, BlockPos center,
                         World world ) {
  double posX = center.getX( );
  double posY = center.getY( );
  double posZ = center.getZ( );

  int old_z = Integer.MAX_VALUE;
  int old_y = Integer.MAX_VALUE;
  int old_x = Integer.MAX_VALUE;

  for ( int degrees = 0; degrees < 180; degrees += 1 ) {
    double rads = next( degrees );
    int startX = ( int ) Math.round( posX - radius * Math.sin( rads ) );
    double endX = Math.round( posX + radius * Math.sin( rads ) );
    double y = posY + i;
    double z = Math.round( posZ + radius * Math.cos( rads ) );
    for ( int x = startX; x < endX; x++ ) {
      world.setBlockState( new BlockPos( ( double ) x, y, z ),
              block.getBlockState( ).getBaseState( ) );

    }
  }
}
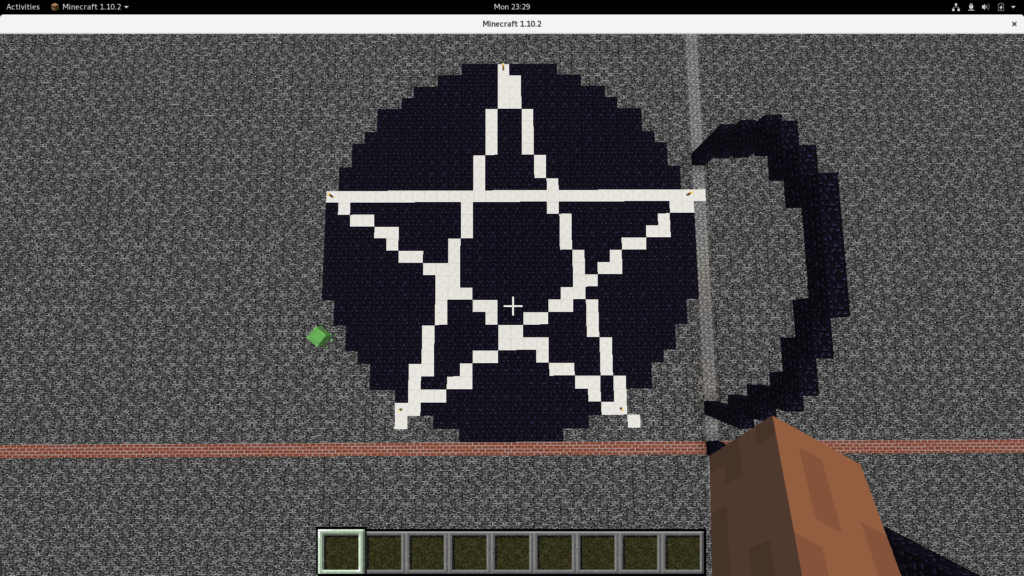
with a star on them
  public static void star( EntityPlayer player, Block block, int i,
                           int max_radius ) {
    int radius = max_radius;
    BlockPos pos = player.getPosition( );
    World world = player.worldObj;
    IBlockState baseState = block.getBlockState( ).getBaseState( );

    Vector< BlockPos > points = new Vector< BlockPos >( );
    for ( int degree = 18; degree < 360; degree += 72 ) {
      double radians = ( 2 * Math.PI * degree ) / 360;
      BlockPos pointPos = new BlockPos(
              pos.getX( ) + Math.cos( radians ) * radius, pos.getY( ) + i,
              pos.getZ( ) + Math.sin( radians ) * radius );
      points.add( pointPos );
    }
    int[] star_index = { 2, 4, 1, 3, 0 };
    int prev_index = 0;
    for ( int index : star_index ) {
      BlockPos prev = points.get( prev_index );
      BlockPos curr = points.get( index );
      Iterator< BlockPos > itr = new LinearIterator( curr, prev );
      while ( itr.hasNext( ) ) {
        world.setBlockState( itr.next( ), baseState );
      }
      prev_index = index;
      BlockPos up_one = curr.add( 0, 1, 0 );
      world.setBlockState( curr, baseState );
      world.setBlockState( up_one,
              Blocks.TORCH.getBlockState( ).getBaseState( ) );
    }
  }
Or stack multiple circles on top of each other to make a cylinder:
  public static void cylinder( World world, BlockPos center, Block block,
                               int levels, int radius ) {
    circle_horiz( world, center, Blocks.TORCH, 0, radius - 1 );
    circle_horiz( world, center, Blocks.TORCH, 0, radius + 1 );
    for ( int i = 0; i < levels; i++ ) {
      circle_horiz( world, center, block, i, radius );
    }
    disk( block, -1, radius, center, world );
    circle_horiz( world, center, Blocks.TORCH, levels, radius );
  }
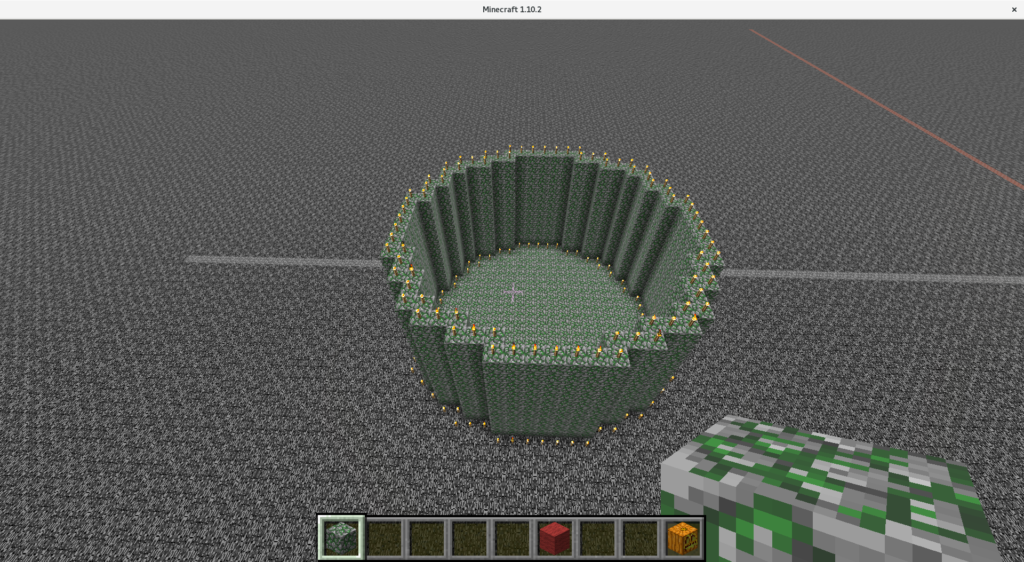
Cylinder of Mossy Stone
Or make the circles get smaller and smaller and make a cone:
 public static void cone( World world, BlockPos pos, Block block, int start,
                           int radius ) {
    int height = radius + 1;
    for ( int i = 0; i < height; i++ ) {
      circle_horiz( world, pos, block, start + i, radius - i );
    }
  }
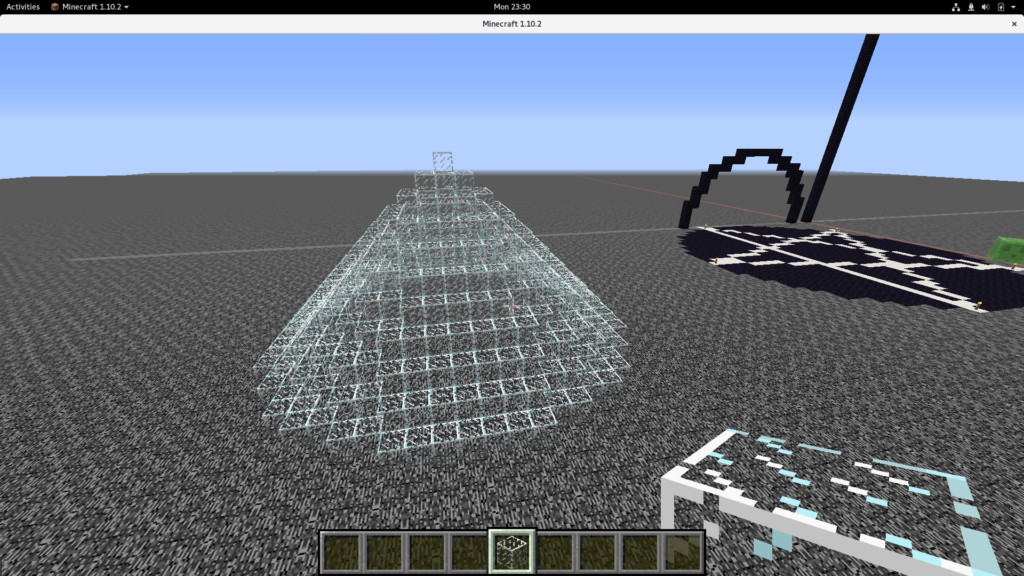
Cone of Glass
Combining these tools you can get creative:
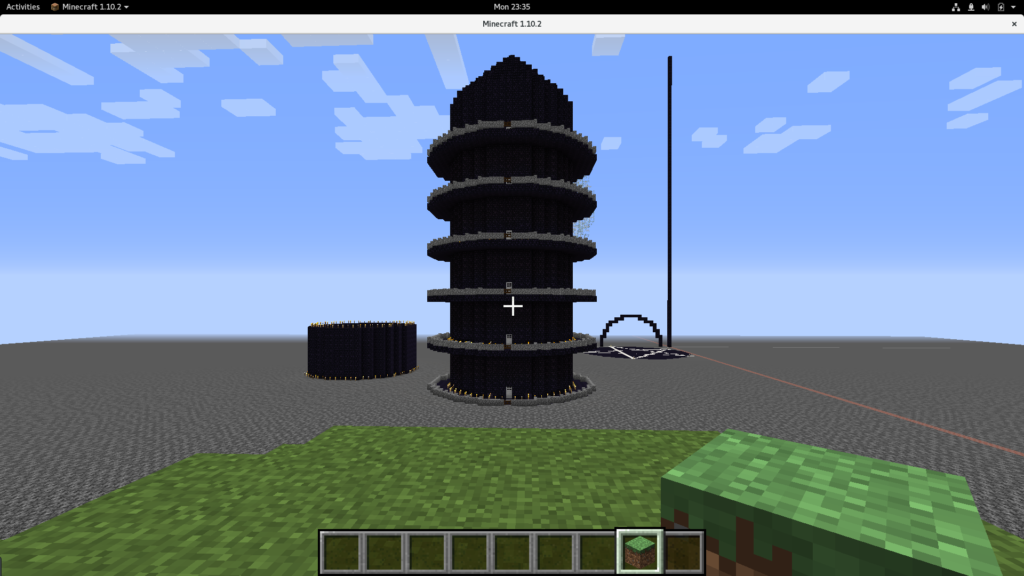
Childe Roland wuz heer.
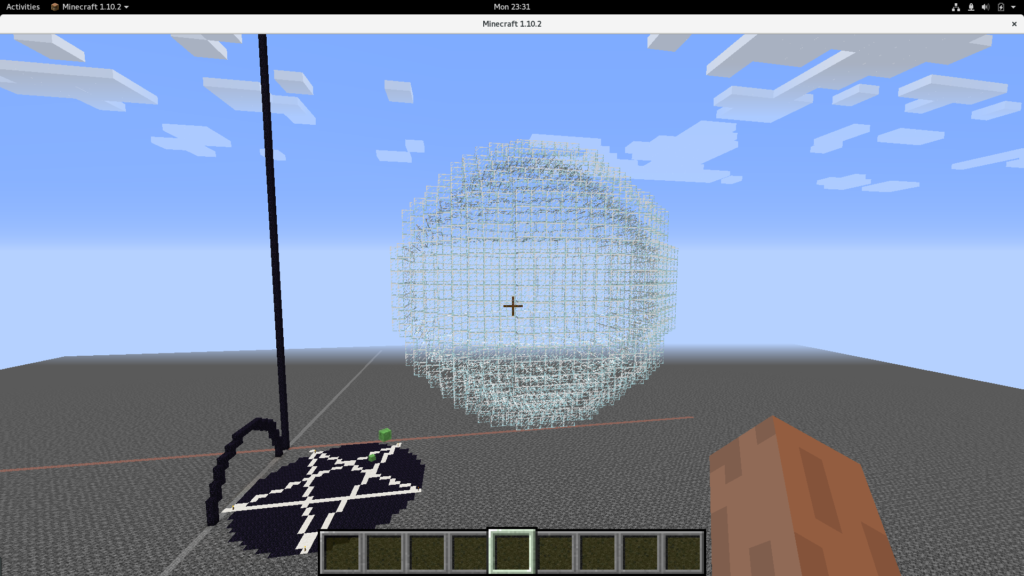
If we combine the XY and XZ plane code, we can make shell of a sphere:
  public static void shell( World world, BlockPos pos, Block block, int i,
                           int radius ) {
    int old_y = Integer.MAX_VALUE;
    int old_z = Integer.MAX_VALUE;

    for ( int degrees = 0; degrees < 360; degrees += 1 ) {
      double rads = next( degrees );
      int dome_radius = ( int ) Math.round( radius * Math.sin( rads ) );
      int y = ( int ) Math.round( radius * Math.cos( rads ) );
      int z = ( int ) ( double ) pos.getZ( ) + i;

      circle_horiz( world, pos, block, y, dome_radius );

      old_y = y;
      old_z = z;
    }
  }
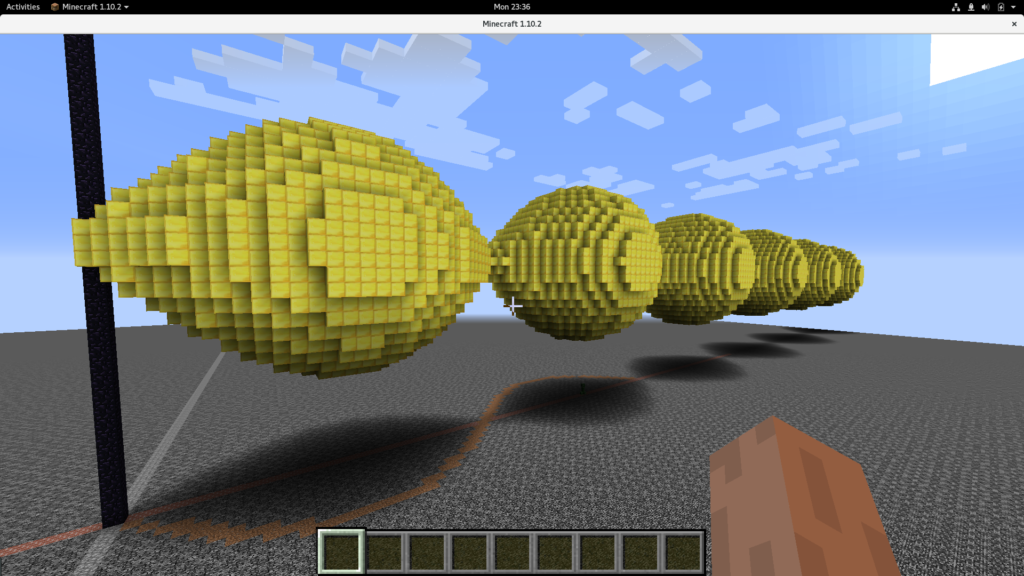
Finally, Add in some logic to make circles around the sine function.
 public static  void sinewave( EntityPlayer sender ) {
    EntityPlayer player = sender;
    World world = player.worldObj;

    float TAU = (float)Math.PI * 2;

    for ( float radians = 0; radians < TAU; radians+= TAU/360  ) {
      world.setBlockState( new BlockPos( radians * 10, 0 , Math.sin(radians) * 10 ), Blocks.DIRT.getDefaultState( ) );
    }
    Block block = get_selected_block(player);
    BlockPos pos = player.getPosition();
    for ( float radians = 0; radians < 5 * TAU; radians+= TAU/360  ) {
      circle_virt_z(player.worldObj, new BlockPos(radians * 10, 0, 0), Blocks.GOLD_BLOCK, 20, Math.sin(radians) * 10 );
    }
  }
}
Have fun.
what next does
what does next function do
It is poorly named. The next function really is just a conversion from degrees to radians. I alled i next because it gives the next value of the measurement. We have to step around the circle in block-sized chunks.