It is possible to run a computer with no persistent storage for its root file system other than a single image downloaded an held in RAM. The computer does not needs a local disk. The computer also does not need a SAN or NAS device for the Root File system.
There are numerous uses for this style of booting. A short list:
- Debugging the installation processes of software packages
- Running computationally intensive tasks on a large array of nodes
- Inventorying the hardware on new servers
- Deploying a light management framework for virtualization hypervisors
Table of contents
Overview
Here is a brief overview of the pieces needed to set this up for testing purposes on a workstation running KVM.
- Configure a local network for PXE traffic
- Install a machine to server as the PXE server
- Install and Configure DHCPD
- Install and Configure TFTP
- create a rootfs
- Install HTTPD
- get a boot image
- PXE Boot a Blank VM
The first piece is done on the workstation itself, and is just overhead for doing this in a completely virtualized environment. This is the analogue of using a private secured backbone for administrative backbone when using physical machines. Configuring the network used to take editing the Network XML file, but now you can deselect the DHCP checkbox in virt-manager when creating a new network. Here is what mine generated in /var/lib/libvirt/network/nodhcp.xml.
 nodhcp
ec819c42-b4b0-1577-363e-1c5918a3ee29 |
You could save that in /root and do
sudo virsh network-create /root/nodhcp.xml |
This one has a bridge defined, which is probably not what you would want for your server, as this network should not see the outside world. Still the device is useful if you want to run wireshark on it to debug booting issues.
Create the server as a VM, and provide it Network interface on both a publicly accessible as well as the Private network defined above. Install Fedora (I used F17 Alpha) as per normal.
Install the Server pieces
yum install syslinux tftp-server dhcp dracut-network httpd httpd-tools apr apr-util apr-util-ldap tftp |
DHCPD
Configure DHCPD by editing /etc/dhcp/dhcpd.conf
allow booting; allow bootp; subnet 172.22.33.0 netmask 255.255.255.0 { option routers 172.22.33.1; option subnet-mask 255.255.255.0; option domain-search "younglogic.com"; option domain-name-servers 172.22.33.1; option time-offset -18000; # Eastern Standard Time range 172.22.33.100 172.22.33.140; } class "pxeclients" { match if substring(option vendor-class-identifier, 0, 9) = "PXEClient"; next-server server-ip; filename "pxelinux.0"; |
Set up TFTP.
edit /etc/xinetd.d/tftp and set
disable = no |
Copy over the Kernel
cp /boot/vmlinuz-3.3.0-0.rc6.git0.2.fc17.x86_64 /var/lib/tftpboot/vmlinuz-3.3.0-0.rc6.git0.2.fc17.x86_64 |
Dracut
Dracut is a great tool for people that need to control the boot procedure of their machines. It has a module called Livenet that we use to specifying that the root file system should be downloaded an unpacked in a directory. In order for that to work, we need the dracut-network package specified on the yum line above. THen, we need to generate a new initial ramdisk (initrd) with the livenet module enabled.
dracut -v --force --add "livenet" /var/lib/tftpboot/initramfs-kernel-3.3.0-0.rc6.git0.2.fc17.x86_64.img 3.3.0-0.rc6.git0.2.fc17.x86_64 |
Syslinux
Syslinux is our boot loader. Syslinux is more than a tool to run an installer (although it does that quite well). Here, it is a program that is configured much as for a kickstart, but it will instead switch to running the kernel instead of Anaconda.
cp /usr/share/syslinux/pxelinux.0 /var/lib/tftpboot mkdir /var/lib/tftpboot/pxelinux.cfg/ |
The configuration for syslinux is in /var/lib/tftpboot/pxelinux.cfg/default and looks like this
default f17 serial --unit=0 --speed=9600 terminal --timeout=5 serial console label f17 kernel vmlinuz-3.3.0-0.rc6.git0.2.fc17.x86_64 append initrd=initramfs-kernel-3.3.0-0.rc6.git0.2.fc17.x86_64.img console=tty0 rd.shell rd.debug root=live:http://172.22.33.2/squashfs.img rw |
The most interesting value here is root=live:http://172.22.33.2/squashfs.img which is what activates the Dracut module in the initrd to download the rootfs via http and expand it into the new root directory.
I know that a couple of these values are incorrect, and I will update when I have them straight, but this will work.
SELinux
Once everything is in place, you need to make sure SELinux is happy. Otherwise, the Kernel will deny the tftp network service access to the files it needs to serve. Of course, you could always disable SELinux, but lets try to do things right To see what the SELinux context for the newly copied file is:
ls -Z /var/lib/tftpboot/vmlinuz-3.3.0-0.rc6.git0.2.fc17.x86_64 rwxr-xr-x. root root unconfined_u:object_r:tftpdir_rw_t:s0 /var/lib/tftpboot/vmlinuz-3.3.0-0.rc6.git0.2.fc17.x86_64 |
[root@f17stack ~]# matchpathcon /var/lib/tftpboot/ /var/lib/tftpboot system_u:object_r:tftpdir_rw_t:s0 |
To set the whole directory to the correct context
chcon -Rv --type=tftpdir_rw_t --user=system_u /var/lib/tftpboot/ |
There is probably a more correct way to do this, something along the lines of
restorecon -R -v /var/lib/tftpboot/ |
But that doesn’t seem to set the user.
Running PXE
At this point you can restart both services. Make sure that dhcpd runs at machine reboot as well.
/bin/systemctl enable dhcpd.service /bin/systemctl restart xinetd.service /bin/systemctl restart dhcpd.service |
To test that things are running correctly:
[root@f17stack tmp]# cd /tmp [root@f17stack tmp]# getenforce Enforcing [root@f17stack tmp]# tftp localhost -c get initramfs-kernel-3.3.0-0.rc6.git0.2.fc17.x86_64.img [root@f17stack tmp]# ls initramfs-kernel-3.3.0-0.rc6.git0.2.fc17.x86_64.img initramfs-kernel-3.3.0-0.rc6.git0.2.fc17.x86_64.img |
Make sure Apache is running and will run on boot:
[root@f17stack tmp]# systemctl enable httpd.service [root@f17stack tmp]# systemctl start httpd.service |
The final step is to setup a bootable image. In this case, we use the same thing that the live CD uses, which is packaged inside of a squashfs image.
I did this on my desktop to keep from having to have too big a file on my Server VM. As it is, this is still close to a 588MB image.
sudo mount -o loop ~/Downloads/Fedora-16-x86_64-Live-Desktop.iso /mnt scp /mnt/LiveOS/squashfs.img root@f17stack.ayoung.boston.devel.redhat.com:/var/www/html /html/squashfs.img |
SELinux
And again, on the server, lets check SELinux
[root@f17stack tmp]# ls -Z /var/www/html/ f16/ index.html squashfs.img [root@f17stack tmp]# ls -Z /var/www/html/squashfs.img -r--r--r--. root root unconfined_u:object_r:httpd_sys_content_t:s0 /var/www/html/squashfs.img |
And make SELinux Happy:
chcon -Rv --type=httpd_sys_content_t --user=system_u /var/www/html/ |
I have to admit, I had already gotten the system to relable the file by the time I tested this, I suspect upon a reboot, so this last step might not be necessary.
Now, open the firewall to let dhcp, tftp, and http traffic through. This can be done via the following rules added to /etc/sysconfig/iptables
-A INPUT -m state --state NEW -m tcp -p tcp --dport 68 -j ACCEPT -A INPUT -m state --state NEW -m udp -p udp --dport 68 -j ACCEPT -A INPUT -m state --state NEW -m tcp -p tcp --dport 69 -j ACCEPT -A INPUT -m state --state NEW -m udp -p udp --dport 69 -j ACCEPT -A INPUT -m state --state NEW -m tcp -p tcp --dport 80 -j ACCEPT |
And restarting iptables:
systemctl start iptables.service
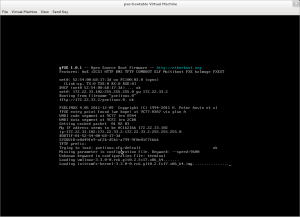
Now Boot the second VM. If all goes well, it will Get its IP address:
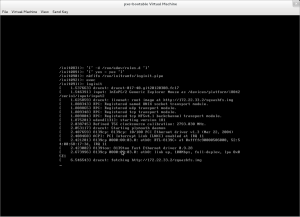
There will likely be a delay as it downloads the 588 install image:
And when it is done, you are at Firstboot:
Thanks to Will Woods for cluing me in about squashfs and livenet, Harald Hoyer for general Dracut help, and Ray Strode for help with debugging why my console wouldn’t echo.


You don’t have to worry about the owner of the file as long as it is readable by the process that is going to serve it (e.g. tftpd or apache). So a restorecon -r on the directory is sufficient, but most likely unnecessary as creating the file in that directory will set the context correctly as shown by your screenshots.
nice information here
check this out too
http://tinyurl.com/7g6btz3